Showing posts with label roasted veggies. Show all posts

Wednesday, February 14, 2007

Happy Cherub Hunting Day!

Happy biggest fake Hallmark holiday of the year day! Oh well, it's a good reason to break out a good wedge of Hilary’s cheese and pop open a bottle of Venturi Shulze Millefiori.

I’m in the middle of another non-stop week of events, dinner parties and climbing prep. Last night, we had some newly-found friends over for dinner. Local college students who are proving that even on a limited student’s budget, basic cooking knowledge and a busy schedule that you can still eat locally and not break the bank or belt. Kudos!

I got home about 6:30pm with a half an hour before our guests would arrive. I whipped off my jacket and turned on the oven to 350F. I chopped up a huge batch of potatoes, parsnips, carrots, onions and garlic for roasting to see us through the rest of this busy week. Depending on how big they’re chopped and their density, they take 30-40 minutes to roast. I cut everything except the onions and garlic into ½ inch cubes for faster cooking. The onions I cut into quarters and garlic remained in whole cloves.

I also dug up a batch of moose sausage and a batch of locally raised and made Bavarian sausages from the freezer. No, we don’t get tired of sausage in this house. Again, I made enough to see us through the rest of the week. A quick sear in a hot pan and those were also popped in the 350F oven for about 20 minutes to finish cooking.

When the guests arrived, I quickly chopped up some freshly picked collard greens from Nanoose Edibles. Into a hot wok, I drizzled in some veggie oil and dropped in some minced raw garlic. I threw in the greens and sautéed them for few minutes. A few grinds of black pepper and a drizzle of Auld Alliance Farm’s (on Gabriola Island) pear balsamic vinegar and we were ready to eat.

Our lovely guests picked up a bottle of Saturna Island’s Pinot Noit from the government liquor store on their way here and that went perfectly with the sausages and veggies. They also brought over a wedge of Little Qualicum’s Raclette cheese (a favorite of mine). They were the perfect 100 mile diet dinner guests. I think we’re going to have them over more often:)

To accompany the savoury sausages was a tart and spicy rhubarb & plum chutney that I made last summer. It gave a nice contrast to the rich and meaty sausages.

We ended the meal with some local kiwi fruit, apples and the raclette cheese.

So for the next few days, I’m going to build all the dinners/lunches around the roasted veggies and sausages. For all those who’s heart is clenching (or drooling) at the idea of sausages for a week, keep in mind that the dishes I’m planning are using the meat as a side element, rather than the main element of the meal. Tonight I’m planning to make a Tuscan style white bean soup. Basically chop up a link of sausage, saute it up, dump in some chicken stock and soaked canelli beans or other white bean (or canned beans). Simmer until beans are done, about an hour. Of course, if you use canned beans, you won’t have to simmer them for that long. 10-15 minutes will be enough time.

I’ll also add a parma cheese or some other unwaxed hard cheese rind. It will help flavor the soup and give it an extra bit of richness. I also find that any good real cheese (not the processed cheddar stuff you buy by the brick) that has gone hard in your fridge also is a good candidate for this use. I simply break them down to smaller chunks and keep the in the freezer until needed. Cheeses like a raclette, any alpine style cheese or farmers cheddars can be used.

Once the beans are done, bring up the heat to a medium high, dump in some of the roasted veggies, some finely chopped kale or chard or collard greens. As soon as the greens turn bright, brilliant colour, you’re ready to eat!

If you want a smoother, creamier soup, blend up half of the bean soup before you add the rest of the veggies. Watch out for the cheese rind! That’ll just gunk up your blender.

If your dinner companions are in the habit of not paying much attention to what they’re eating and tend to scarf down their food, I’d pull out the cheese rind so nobody gets a mouthful of spongy cheese rind. Then again, maybe you ought to leave it in there to teach them to not scarf down the lovely meal you prepared for them :p

BTW, I'm going to be at the Ban Terminator Event in Parksville tonight and at the Nanaimo Malaspina University event tomorrow . Drop by the Nanaimo 100 Mile Diet Challenge table and say 'hello!'

Happy Eating!

Jen

Thursday, November 23, 2006

Season of the Lost Mitt

And so it begins, another season of the lost mitt.

It started late this year. Usually, the first one is lost by Hallowe’en. But it has been warm and wet and I didn’t pull them out until these past few weeks.

I usually go through 3 to 4 pairs a season. Let me clarify that. I knit 3 to 4 pairs and proceed to lose them throughout the fall and winter. Actually, I only lose one of each pair. Like socks. They are a related species, you know. They branched off at the beginning of the Lanolinian Epoch.

My mitts are all basically the same pattern. A tube with a crocheted thumb. All fingerless so I can easily knit, type and run my fingers through my beloved’s hair. It’s cold and drafty in this old house, especially in the mornings. I also just love the look of them.

I used to make them with fine yarns. I once knitted a gorgeous pair of dark teal fingerless mitts that rose past my elbows made from Garn Studio’s Alpaca yarn. Leaf and vine detailing going all the way up the forearm and even a bit of beading at the cuff. I wore them once before I lost one. I’m not ashamed to admit, tears were shed.

I’ve learned to make them out of more reasonably priced yarn. By that, I mean yarn that doesn’t leave me eating turnips all week. I’ve also learned that it’s prudent to make them out the superwash wool. I swear they practically jump into the laundry hamper when I’m not looking.

I lost this first one of the season, a dark grey merino wool mitt in a lovely twisted rib and diamond pattern, somewhere between the video store and the liquor store. Bullets of shiver-inducing rain were pouring from the sky or else I would have looked for it. Poor thing, it probably melted into the grey of the pavement, pummeled to death by the rain.

Let’s have a moment of silence for that brave little mitt that sacrificed itself, heralding in a new season of lost mitts.

Its mate is still on the counter. Waiting, hoping that to be reunited again with its partner. Its kinda sad, I don’t have the heart to tell it that it’s hopeless. Its trying to be strong and gave me a nasty look when I began casting on stitches for a new pair last night. I can’t help it. My hands are cold.


I’m making this one out of sock yarn that I found in the discount bin. I reason that the strength of the sock yarn will prevent the wear and tear. It’s just wishful thinking on my part that they would ever stick around that long to get worn out.

I'm using a simple ribbed pattern for the palm and wrist part and to maybe turn those ribs into cabling as it carries up the forearm.

A sane person would simply replace the missing mitt. A sane person would stock up on one yarn and dedicate that for mitts alone. A sane person wouldn’t be knitting the mitt equivalent of aran sweater. A sane person would get a heater.

Oh right, I forgot...sane people don’t knit.

Onto some food stuff…

My DH and I play this little game where I stealthily see how little flesh I can get away with serving him. His job is to detect when I have begun this meat rationing. I have found that if go completely meatless, he notices it within two meals and starts grumbling about how he’s an Inuit and therefore genetically predisposed to being a carnivore and my vegetarian tendencies will be the death of him.

I actually like flesh. I just think we as a society eat too much of it. I'd rather spend my money on smaller amounts of locally grown, ethically raised, environmentally sustainable, higher quality flesh than spending the same amount on buying a huge amount of factory farmed, doped-up Walmart flesh from who knows where. It’s also way better eats. I swear, the reason why so many beasts like frog to snake to rats are often touted as tasting like chicken is because we're nation that has no freaking idea what a real chicken is supposed to taste like.

I just use less but I get more out of it. Most meals only have a couple of ounces of meat but it’s good, tasty local meat that actually tastes like something that used to roam and live well. By using better quality meats, I can use less of it and DH doesn’t feel like he’s lacking for protein because he actually taste the meaty goodness.

But every now and then, even I want a steak. A good, solid, meaty steak bursting with unami bliss. Last night was one of those nights.

Here’s what we had for dinner last night:


Moose steak in a shitake mushroom- red wine sauce with roasted potatoes and squash.

The steaks where gifted to us from Kev’ family. I pan-fried them for 4 mins on each side over medium-high heat, along with some sliced fresh local shitake mushrooms. I deglazed the pan with a generous glass of Blue Grouse Gamay Noir, dumped in some already roasted up onions and red peppers and some sage from the garden. Scraped up all the lovely moose bits from the bottom of the pan and let it all reduce down to a third. Popped in a knob of good Island farm’s butter. A good pinch of salt, a couple grinds of pepper and it was done.

The potatoes and squash were from this weeks roast up. I simply popped them into the oven at 350F while I was cooking up the steaks. They were dressed in nothing more than a drizzle of balsamic vinegar, salt and vinegar. Simple, simple, simple.

The moose was just the shot of protein I was craving. It had the good, clean meaty taste of an animal that roamed the land. The earthiness of the shitake mushrooms and the full-bodied red wine sauce provided just enough complexity. Kev didn't talk throughout dinner except to grunt 'Meat Good' every now and then.

I actually couldn’t eat up all of my steak and saved half of it for lunch today. I’m thinking of tossing it in some udon miso soup with some roasted veggies. It certainly is noodle in soup weather today.

BTW, the Cedar and Yellow Point Annual Country Christmas Tour begins today. It’s a self-guided tour through the many artisans and farms in the Cedar – Yellow Point area. Kiwi Cove lodge is offering a special kiwi inspired lunch and Yellow Point Cranberries is offering tastings of it’s many cranberry products. Hazelwood Herb Farm, Malva Herb Garden and Fiddick’s Farm is also on the tour. This event runs from the 23rd to 26th. Check it out!

Happy Turkey Eating Day to everyone in the US.

Later,

Jen

Monday, November 20, 2006

Weekend whirlwind

Another wild and burly weekend. I bopped about from craft fair to beachcombing (you never know what these storms will wash up onto the shore) to my back garden to some knitting to Gabriola Island with some friends for more craft fairs, beachcombing and a couple of awesome nurseries where I saw the most gorgeous eucalyptus tree (koala not included) and then back home for more knitting.

It was also the arrival of the Beaujolais Nouveau . Since BN is not a local wine, I decided that for every bottle of BN consumed, we would have to consume a bottle of local wine. I chose Blue Grouse’s Gamay Noir since it uses the gamay grape that the BN are made from. As much fun as the BN is, I blissed out on the summery tones of the Blue Grouse wine. Build on the fertile slopes of the Cowichan Valley, Blue Grouse vineyards puts out some of my favorite wines. Their Black Muscat is the perfect intense red wine to go with your favorite dark organic chocolate. Thanks to its great location and soil, the vineyard doesn’t use fertilization or irrigation.

We celebrated wine, local and not so local, with a couple of intimate dinners and a couple of not-so-intimate dinners. Here’s what we had for one of our dinners:


Local buffalo sausage, caramelized onions, roasted veggies and a butternut squash gratin. Pretty much everything was grown locally from the sausages to the veggies to the cheese in the squash. The caramelized onions are your basic recipe of sliced onions brown in butter and braised slowly. I used a glass of Blue Grouse wine to deglaze and braise the onions. Yep, it was divine.

The veggies included local purple & golden carrots and Saanich potatoes tossed in EVOO and dumped into roasting pan. The sausages were simply browned and then tossed on top of the veggies to finish cooking. The butternut squash gratin was leftover roasted squash dumped into a pan with some EVOO, Little Qualicum’s raclette cheese and a couple of cloves of roasted garlic. I drizzled some balsamic vinegar over it once it was done.

Everything roasted away in the oven at 350F for about a 40 mins while Kevin and I watched Harry Potter’s Goblet of Fire and drank too much BN and Blue Grouse’s Gamay Noir.

Here’s what we had the following morning to quietly move us into the day:


Blueberry pancakes with blueberry/blackberry syrup and scrambled eggs. I finally have started dipping into my hoard of frozen blueberries picked from a local u-pick this past summer. A sweet, summery visitor to our breakfast table, along with very egg-elicious scrambled eggs courtesy of Cedar Valley Poultry. This picture is Kevin before he stuffs that huge chunk of egg into his gullet.

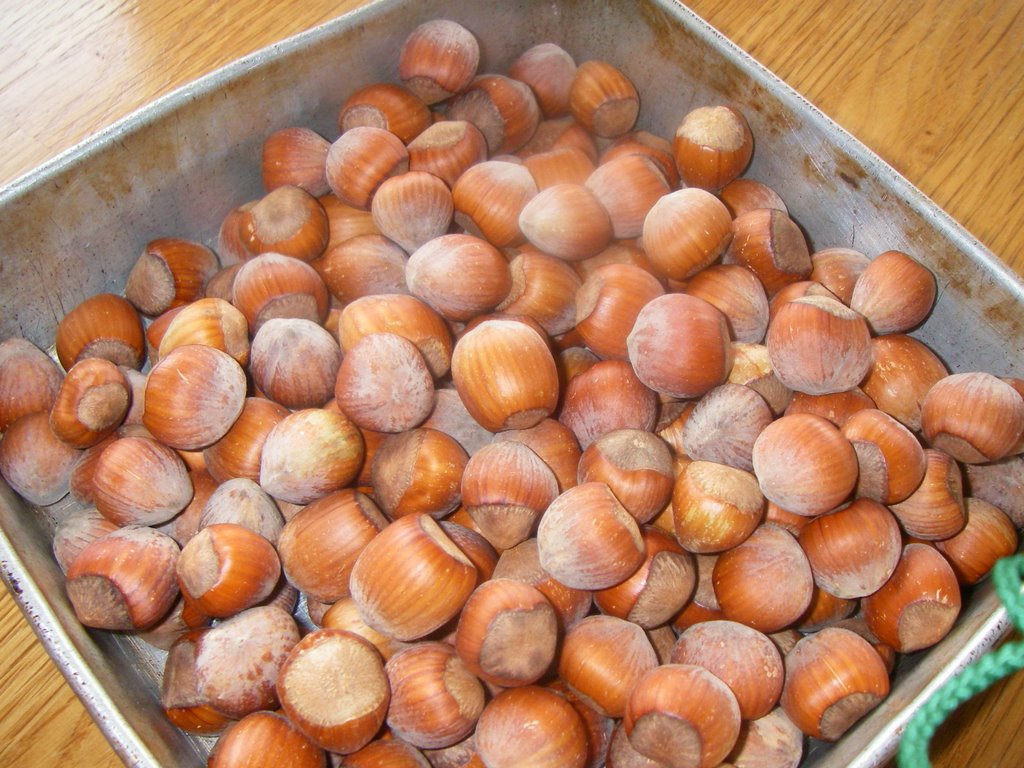
I also roasted up a batch of local hazelnuts. These are from Foote’s Hazelnut farm in Chemainus.


They have a stand open on their hazelnut farm. Just go along the Island Highway to the big yellow and green Antique barn building on Henry Rd and turn in. Follow Henry along it’s mellow, winding limb for a couple of kilometers until you get to the green metal gate. Push the button for an ‘Open Sesame’ (or Open Hazelnut in this case), drive on through the orchard. You’re aiming for the big, brown house in the back. The hazelnuts are by the front door and it pretty much runs on the honor system.

I’ve found Foote’s hazelnuts also at the Quist meat market in Duncan. Nanoose Edibles also carries local hazelnuts.

To roast, simply dump the nuts onto a baking sheet in a single layer and toss into a 350F oven. After 10 mins, give the pan a shake and return it to the oven for another 5 or so minutes. Let the hazelnuts cool and then crack away!

They can be kept unroasted and in their shell for a few months in paper or mesh bags on the shelf or a couple years in a sealed plastic baggie in the freezer. Considering that hazelnuts in the stores are going for $1.50 to $2 for a 100 grams, buying them this way is a great deal. Especially since nuts go rancid once shelled, these are also tastier.

Warning: Ramblings about knitting ahead!!!

I’ve started on another sweater. I know I just finished one but I’m waiting for my lovely mum-in-law to drop off yarn for her sweater so until then, I’m working on this:


It’s the sleeve for what I’ve named the Midsummer’s Nights Dream sweater. I’ve been wanting to do a MsND sweater for ages. Here's the yarn I'm using:

The colouring is going to make it more of a Tri-seasonal Night’s Dream sweater but I can live with that.

My design ideas have taken several turns from a lace weight cardigan with bell sleeves (what the heck was I thinking? I can barely knit a lace weight dishcloth) to a cape and vest combo to an updated version of EZ’s Moebius sweater. Over the summer, I picked up a batch of Phildar Auteil yarn that struck me as very MsND sweaterish and decided to let the yarn tell me what it wanted to be. The yarn was uncooperative all summer long and wouldn’t confess it’s innermost desires. So I threw it into the darkest corner of my yarn stash and hoped imprisonment would loosen up its tongue.

While finishing up my kimono shrug, I heard whispers and sly riddles coming from that corner of the yarn stash. Or maybe it was the end-of-the-project itch. When you’re near the end of something and part of you is delighted that it’s finally going to be finished but the rest of you is wondering ‘What will I knit next?’

Finally the yarn betrayed its intent and I began doodling out scratchings and scribbles. So far I have a lot of scratches and scribbles in my knitting journal. I still have no idea what the body of this is going to look like. I’m hoping a couple glasses of Cherry Point’s Bete Noire will give me the inspiration I need when I get to that point.

I’ve usurped this construction idea from Knitty.com. Simple design of tubes and there’s no seams! Yippee!

Of course, leave it to me to completely morph a simple and brilliant design into a monster of mayhem. As you can tell from the above picture, I’m not working the sleeves in a tube. I’ve decided I want the sleeves to decrease down into a leaf point at the wrists. Yes, a leaf point. Right over the top of my wrists. I don’t know how I’m going to do it. I don’t even know where the idea came from. I blame it on that 2nd glass of Beaujolais Nouveau. That will teach me to drink non-local wine.

I know that I could be working the sleeves on dp needles and be able to maintain the tube structure of the sleeves. However I hate working with dp needles. Also, there’s a high chance of my forgetting to count my rows, or mess up the decreases (or both) and turning this lovely pattern into a briars patch.

I am 2/3rds through the 1st sleeve. I haven’t done a swatch. I have no idea if I have enough yarn for this. On the good side, the yarn is machine washable and I’m loving that Aran pattern. It looks like dragon scales from certain angles.

I’m also playing with the idea of doing most of the torso with ribbing. Maybe a twisted rib. Not sure how I’m going to play the remaining two colours together. Maybe something intarsia, maybe I’ll just do panels. Not sure.

One of these days, I’ll actually design a whole sweater BEFORE I start knitting it.

Yeah, right.

Anyways, we’ve having our friends Karin and Dave and his parents over for a curry dinner tonight. Karin is coming over early for a refresher course on how to make naan. I have to make sure the house is in some sort of civilized order. I also have this annoying thing called a job I should get to...

Later,

Jen

Friday, November 10, 2006

Feed me!


(insert lame ethnic cooking comment or Dr. Seuss rip-off here)


Most chefs, professional or in-home, love getting invited to dinner at other’s people’s homes. This is different than going out for dinner at a restaurant, which is fun but not the same.

I relish being on the receiving end of a home cooked meal. Sometimes I’m just tired of cooking for everyone else, even for myself. Really, there are times when I’d rather sit back, read, knit, go for a paddle, join a friend for a climb, hang out, goof off and then show up at the dinner table and have a home-cooked meal waiting for me. I know it’s hard to believe but really, there are such times ;)

Sometimes I get tired of my own cooking and am hungry (pardon the pun) for someone’s spin on a dish. Recipes are a great vehicle into a family’s history and a culture. I learned to make many dishes by infiltrating friend’s kitchens, along with learning a great deal about them.

I can count on one hand the number of times I’ve been invited to other people’s dinner table this year. Most of those times have been at my in-laws, who are great cooks.

This lack of dinner invitations is a common problem amongst kitchen savvy folks. It’s a pattern that a social circle falls into. The one kitchen compatible friend gets branded the ‘chef’ of the group and everyone just shows up at their place for dinner by default. Though a few of us are arrogant oafs, most chefs make lovely dinner guests. Just keep the wine bottle away from us ;)

I’ve been told by my culinary neophyte friends that they’re afraid to invite me over for fear of what I’d think about their cooking. They fear that I’d be dictating a scathing review in my head, silently nitpicking at their dishes, muttering to myself about how the carrots are bland and that the pasta is overcooked. I’m horrified that they would think I would behave so. Part of this inferiority complex is fed by the assumption that what I cook at home is complicated (it isn’t) and that I am privy to chef-jedi secrets (I wish). If anyone is going to appreciate a home cooked meal, it would be a chef. Who better to know what you went through to put together a meal than someone who has to do it every day?

To remedy this, I’ve been offering to teach my friends or family how to cook in hopes that they will feel confident enough to invite me over for dinner. I’ve had some great successes with my Vancouver circle with a trio of vegan ronins, the love child of Nigel Slater and Nigella Lawson and a spatula-wielding knight who wooed his lady with 4-course meals. However, on the island I haven’t had much success with this plan.

This has all changed now that our dear friends Karin, Dave and the 5 furry kids have moved into Nanaimo. I’ve known Karin since our Squamish days and she’s been gleaning cooking lessons from the beginning. I spent this past weekend at their place, teaching her how to make everything from Pad Thai to sorbets to preserving. It’s finally paid off ;)

Last night, I got invited to their place for dinner. A real dinner invitation. We made plans earlier in the week and everything, as if we were grown-ups or something. DH was invited too but wasn’t feeling too social. I think his new SOCOM 4 game had more to do with his absence than any anti-social tendencies.

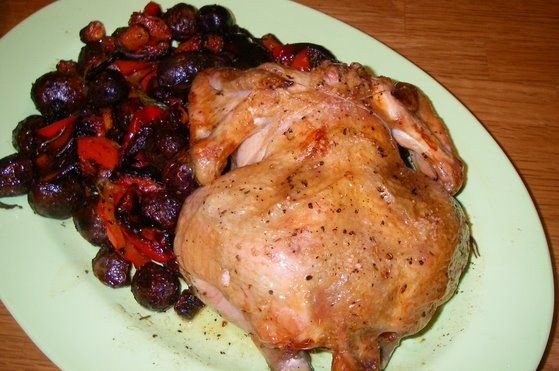
So off to their new home I went. I was greeted at the door by their 5 furry kids and the enticing aroma of dinner cooking. Dinner was a beautifully roasted local free-ranged chicken that they picked up from the Shady Mile market and some local veggies roasted right in the pan.

Dessert was a duo of sorbets, a coconut lime and a cranberry. The cranberries were made with a batch we picked up from Yellow Point cranberries. A simple and elegant way to end an equally simply and elegant meal. Bravo!
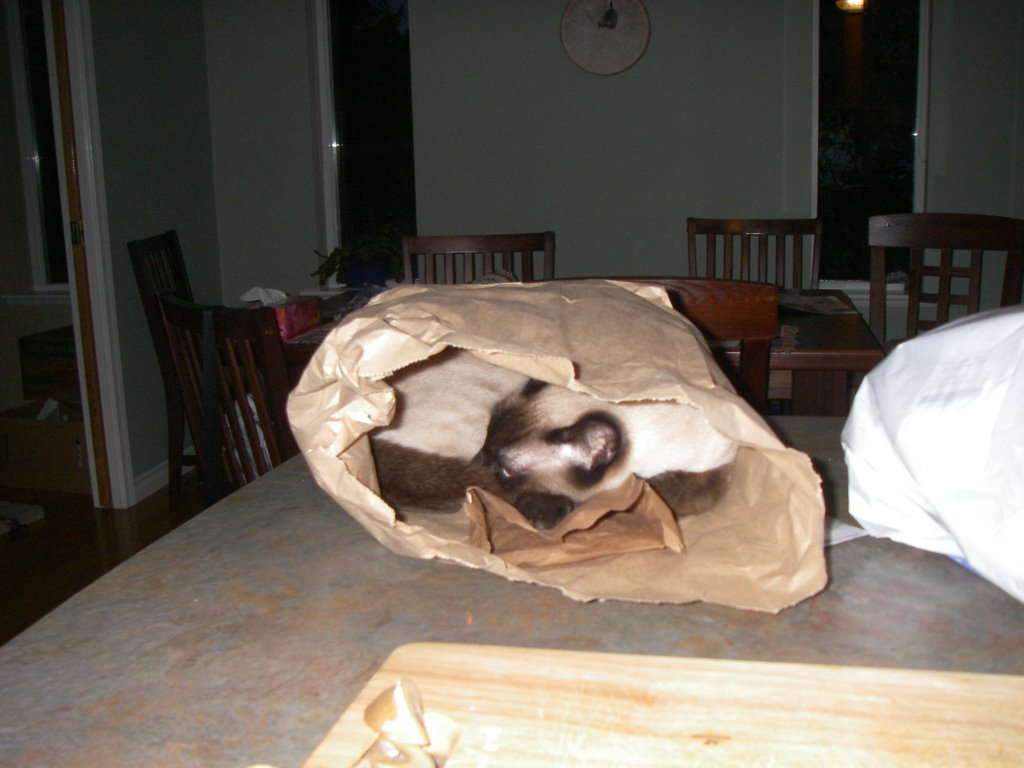
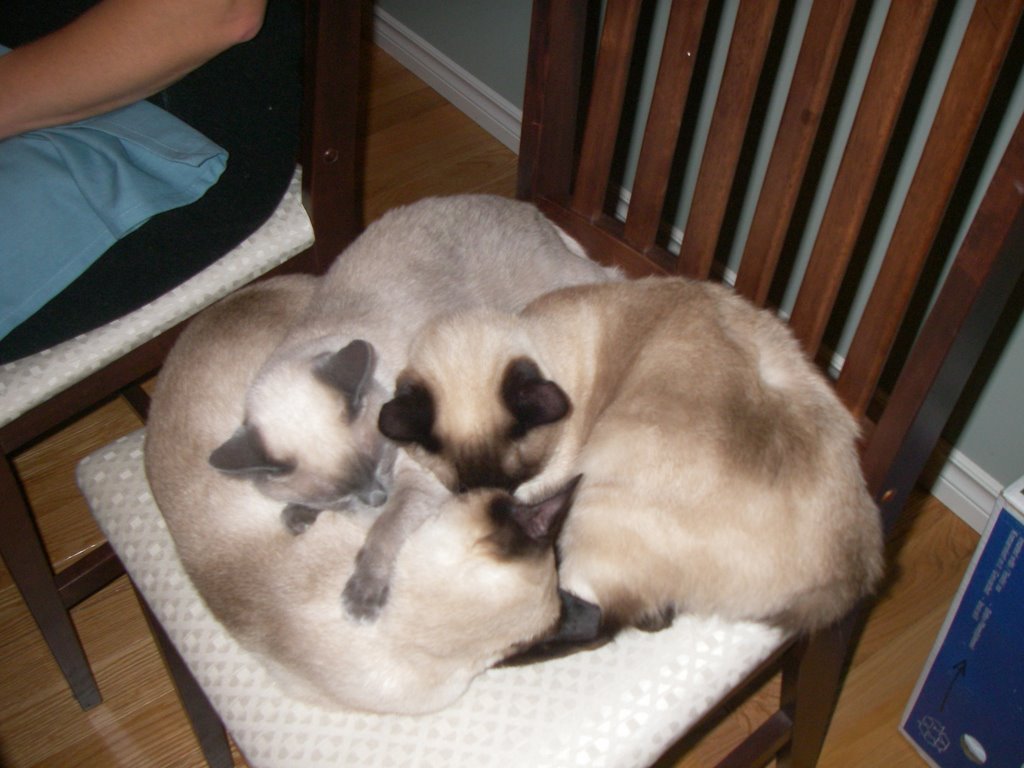
We even had dinner companions:


(the cat version of college kids all piling into a telephone booth)


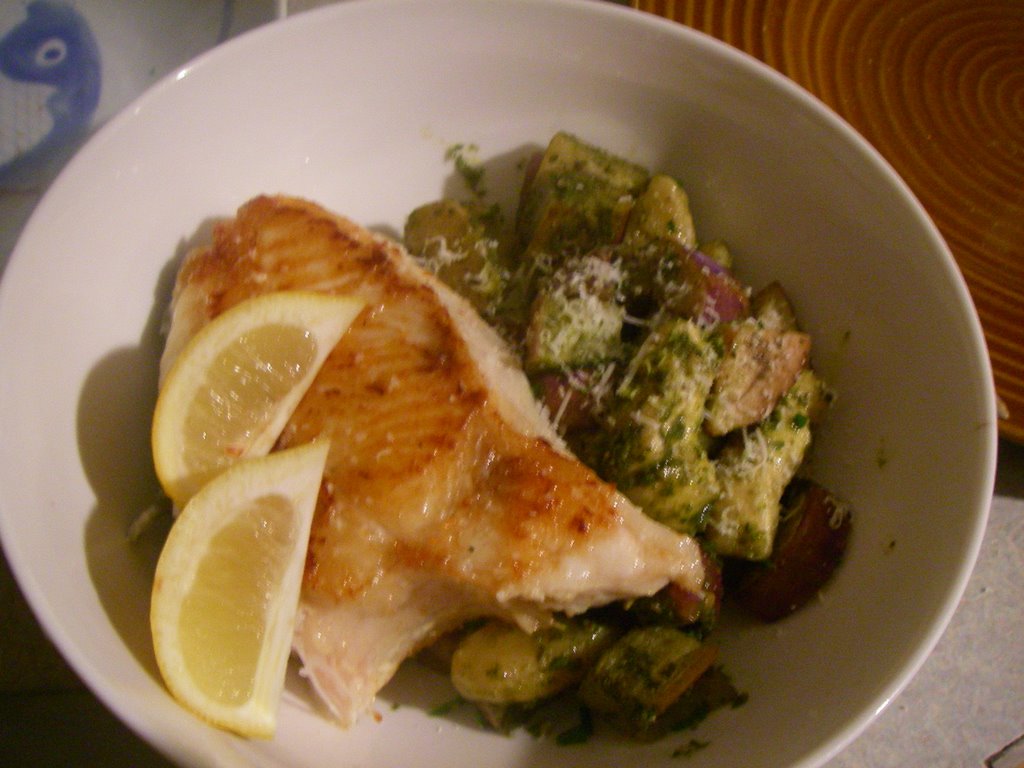
For dinner, I picked up a bottle of Ortega wine from Zanatta vineyards in the Cowichan valley. All the grapes used for their wine are grown in their Glenora vineyard. It was a fruity and rich white wine that paired well with the chicken. I could see it going really well with a Thai green curry or the pan-fried halibut with pesto gnocchi we had last week

(Thanks Pete for the halibut. I was awesome!).


BTW, I picked up the wine at North Gate beer and wine store, across from Superstore. It’s got a great selection of local wines and ciders.


I also found Volume 2 of my favorite red wine, Bete Noire (Black Beast) by Cherry Point Vineyards. This local red is a bit rough and bloodthirsty, with a deep fruity finish. In other words, a great wine snob repellant ;) I think red wine ought to be a bit bloody and carry itself with a bit of a swagger. Anyways, how could you resist a name like Bete Noire?


Hosting a dinner party doesn’t have to be an ornate affair. You don’t have to make everything from scratch. Sometimes it’s just a matter of assembling a dinner. On the island we have a great selection of locally made cheeses. Everything water buffalo to cow milk cheeses to fill your cheese plate. Nanoose Edibles carries a great line of smoked albacore tuna and salmon for an appetizer and locally made dressings for your salad. There are prepared jams and jellies for folks to nibble with crackers. Check out Golden Maples Farm at a Christmas craft fair near you. She makes her products from fruits and veggies grown right on her own farm. She even has lemon and lime trees growing in her greenhouse!

For dessert, pick up a Grandma’s Country pie from the Nanaimo Sausage House on 3018 Ross Rd (behind the County Club mall). They have a sour cherry pie that is getting quite the following. Their blackberry pie is on the top of my list. They have a range of pies from berries to pumpkin to lemon meringue. You can contact them at Grandmascountrypies@shaw.ca and place your order. While you’re at the Nanaimo Sausage House, pick up some sausages. They make them right there on the premises and it shows. We’re fans of the hot pepperoni and their smokies are DH’s favorites and that’s saying a lot. They also carry local cheeses and free-ranged eggs.

The main course can simply be a simple soup, a roasted chicken or fish. Heck, I’ve served scrambled eggs and toast for a dinner party.

For larger dinner parties, hold it as a potluck. Better yet, host it as a 100 Mile Diet potluck and have folks bring in their favorite locally-grown dish. Before you start the meal, have everyone introduce their dish and where they got the ingredients. This is great way to share and learn who your local growers are.

Have a tasty day!

Jen

Wednesday, November 08, 2006

Noodling around

In answer to Anon.'s question about cleaning chantrelles: I can't take all the credit for how spiffy and clean those mushrooms look. My friends who gifted me with them did a bit of cleaning before handing them over. I find a mushroom brush and any cleaning brush with stiff tooth brush is all you need. Chantrelles get waterlogged very easily so a dry approach is the best bet. If they are really dirty, a quick splash under running cold water should be all you need. Part of the solution is in the picking itself. Pick chantrelles that are already clean. I'm still seeing them out there on grocery shelves. Get them while you can!

Yesterday was a Novocain infused haze after an emergency dentist visit. Thanks to everyone at Dover View dental for making my ordeal as pleasant as possible. Dentist’s offices have really come a long way. They had a TV imbedded into the ceiling like my old dentist in Vancouver which was pretty much what sold me. Pretty cool except that when I first was lowered to start the session, there was some horribly, traumatic hospital soap opera scene that didn’t help much to calm me. They also had a pretty sweet LCD computer screen in front of the chair that flashed a slide show of postcard perfect scenes including some gorgeous shots of the Grand Tetons in Wyoming, my new mountain crush. They even brought up my x-ray on it so I could check it out. I hope my maxillary molars never have to get yanked because those roots look pretty gnarly.

DH got washed up across the border and back home the night before. He insisted on driving me to the dentist and I’m glad he did. I got two shots of Novocain and that left me tired and wanting to simply curl up and hide from the world. Well, part of that was because I was doing a really drooly Jean Chrétien and just didn’t want to face the world ;)

Needless to say, I wasn’t in the mood of doing much except for knitting and zoning out with my DH. Knitting in itself was a bit of adventure. I’m coming close to the homestretch with my kimono-shrug-wrap and would be done expect for all the frogging I had to do thanks to my inability to count. Oh well.

Dinner was a chicken & roasted veggies in black bean sauce and pan-fried udon noodles. A pretty simply, peasant meal. Thank goodness I had the vat of roasted veggies to draw from. It certainly made things a whole lot easier. The chicken and all the the vegetables are all locally grown. Here’s the fast-& dirty recipe for that meal (recipe for 2)

½ chicken breast – in 2cm cubes (can substitute with firm tofu)

1-2 cups cabbage shredded – I used red but you can use any cabbage from green to any of the asian cabbages

2 cups roasted veggies

1-2 tsp grated ginger

1 tablespoon fermented black bean sauce – you can make your own, I just used stuff out of a jar

1 package udon noodles

½ cup liquid for deglazing – water or stock

peanut or veg. oil

In frying pan (I’m using a Teflon), add a teaspoon of oil, coat the bottom of the pan over medium heat. Once hot, add the noodles, arranging them in a single layer. You want as much of the noodle in contact with the bottom of the pan. Let cook for 3-4 mins. Do not move it around. You want the noodles to get crunchy and brown. Once they’re done you can just take the pan off the heat and put aside.

In a wok, heat up 1 tsp oil over medium-high heat. Place chicken in a single layer, uncrowded onto the bottom of the pan. Again, don’t be messing with it, you want it to brown. Let cook for 2-3 mins before turning the chicken pieces until their nice and golden brown and then turn over and brown the other side. Once cooked, removed to a bowl and keep covered.

Add a touch more oil if needed, return wok to heat and add ginger. Stir fry for a few seconds and then add the cabbage. Stir-fry for a minute, then add the roasted veggies and the chicken back in and cook for another 2-3 mins. Move the chicken & veggies to a side of the wok and dump in the black bean sauce. Let the sauce heat up for a minute before mixing with the veggies. This allows the sauce to cook and caramelize a bit and that helps bring out the fermented black bean yumminess. Deglazed with liquid and thicken with a cornstarch slurry if you want.

I like the serve the noodles and the veggies beside each other so that pan-fried noodles maintain their crunchiness. Even in a doped-up state, I made this in less than 20 mins.


Tah-dah...

Even though I could only chew and taste on one side of my mouth, it was so good. DH loved it. He loves anything in black bean sauce. I could serve cardboard in black bean sauce and he’d probably eat it.

This is a total yin-yang dish. The sweetness of the roasted veggies helped balance the saltiness of the fermented black beans. You had the different crunch factors of the cabbage and the pan-fried noodles play up nicely against the soft texture of the roasted vegetables and the meaty chicken. And of course, the darkly-sauced veggies and chicken visually play up nicely against the white udon noodles.

Now, if you wanted to, you could make a double batch of this and have some for a soup version of this dish the next day. When I say soup I mean nothing more than heating up a couple of cups of chicken stock, dumping in the leftovers and simmering for a few minutes. That's my idea of fast food ;)

Enjoy!

Jen

Monday, November 06, 2006

The Yin & Yang of Kiwi

Before I fill you all in my tasty weekend, I have a few things to take care of.

First off, I take back what I said about the rain in the last entry. From the sounds of it, I’d better book my spot with Noah. The rain is getting so bad that DH has decided to cut his big climbing trip short and head home.

Secondly, (Jen pulls her soapbox from underneath her chair), I’m sick and tired of the Kiddie Candy Cartel. Less than a week after we were held hostage by the annual Candy Begging holiday, I have a young girl knocking on my door begging for me to buy crappy candy for more than I spend on real chocolate. The girl was selling stuff that couldn’t even be called chocolate since the chalky crap that covers the questionable fillings are so low in cocoa content that they aren’t allowed to be labeled ‘chocolate’. According to her, this is part of her a youth job initiative to teach students responsibility, how to count money and how to interact with the public. Right.

I wonder what sort lesson we’re really teaching these kids considering the levels of obesity and diabetes are rising steadily amongst that demographic and here we are encouraging children to hawk the same things that will make them unhealthy. What’s even more absurd is that it’s the same freaking candy that all the other schools are using for fundraising. Does Hershey's Canada have some sort of monopoly on school fundraisers? Or is this simply the fault of a bunch of imaginatively-challenged adults that can’t think of a better way to fund school programs other than using kids as sugar-pushers?

Schools are completely missing the boat here. There are plenty of local farms and food producers that would be perfect for school fundraisers.

So did I buy a box of candy? Well kinda no and kinda yes. I gave her money for a box and asked her to drop it off at a Food Bank box. I know, folks who use that service don’t need any more high fructose corn syrup, trans fat and other nutritional sludge in their system either. I just kinda felt bad for the girl which is partly the reason why they keep sending those kids out to sell this horrid stuff. Grrrr.

Now onto the rest of the show…

I spent the weekend giving a couple a friends a crash course on that is good and tasty on this crust of the island. Since they lived the Jinglepot Rd. area, we started off Saturday with a quick stop at Gary Argyle’s farm where we found beautiful tomatoes going for 75cents! Gary says that he’ll have one, maybe two more weeks of tomatoes. I stocked up with about 15lb to see us for the next few months. I also grabbed a couple pounds of green tomatoes and some really, really sweet carrots.

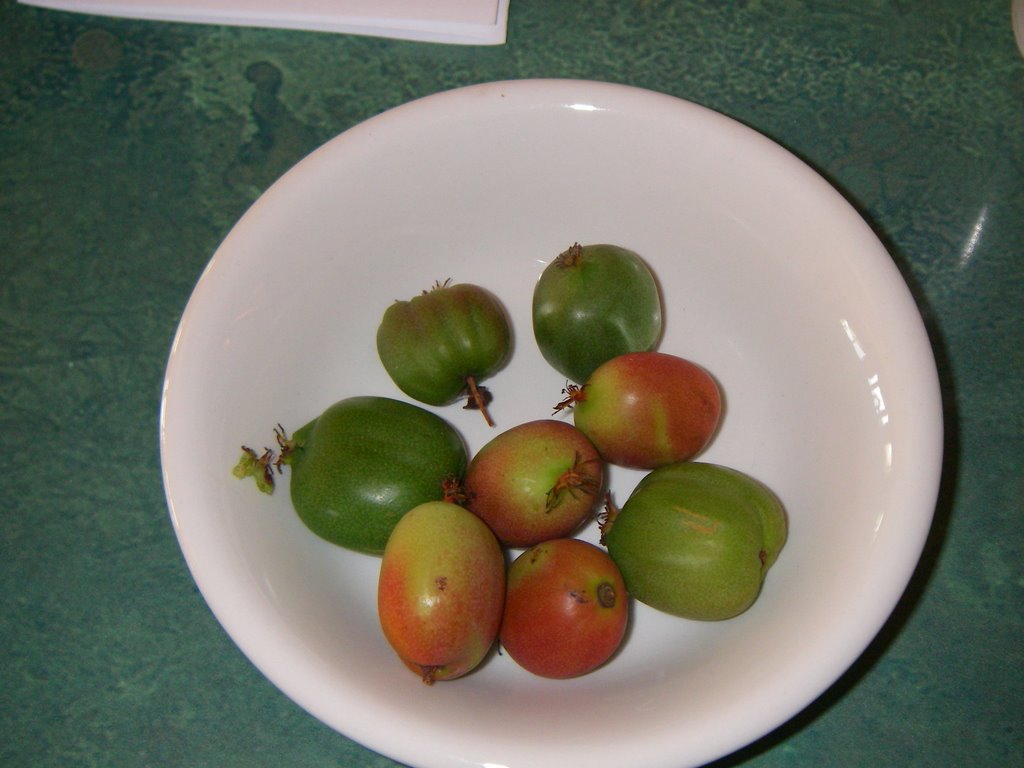
Amongst our other stops were Yellowpoint Cranberries to grab several pounds of cranberries and Kiwi Cove Lodge where Peggy had a case of arguta kiwi fruits waiting for us. They are the last of the season the frost did in the ones left on the vine. With our bounty we headed back to their place where we canned, froze and feasted in celebration of bounty.

Canning, freezing and preserving can be a bit intimidating for the uninitiated and stressful even for practiced preserve pros. Doing it with a couple of friends is a great way to get around all that. Take advantage of local produce when the price is right. Get a couple of friends together and work out a production line. In a few hours you will all have a bounty of preserved food to see you through the leaner months of the winter when a tomato is scarcer than a tan line. There are several websites and books to teach you how to preserve food. Nanaimo Community Gardens also offers courses on it.

Tonight, I’m dining solo. In preparation for the week ahead, I roasted up a bunch of veggies to draw from for my meals. I did up the carrots I got from Gary’s farm, onions, red peppers, butternut squash, parsnips, potatoes and several cloves of garlic. I simply chopped everything up into bite size cubes (1-2 cms) and popped them onto lightly oiled pans. I didn’t even bother peeling the squash or the carrots. Butternut squash skin is so thin it doesn’t really matter. Carrots don’t really need to be peeled if their under 1 inch in diameter. Every culinary student and chef out there is gasping in horror right now. I know, we’re supposed to peel everything naked. We’re such veggie perverts. Some veggies need to be peeled because their skin imparts a bitter taste. Other times it’s simply an esthetic thing. Peeled carrots make for a more refined dish. Well, I’m about as refined as rusty chainsaw so no peeled carrots or squashes for me tonight.

I placed them on the middle 2 racks at 325F for 20-30 mins depending on the density of the vegetable. I kept them all segregated with the denser vegetables (carrots and squash) together in one pan and the others in another pan. For about 20 mins of chopping and 20-30 mins of letting the oven do it’s thing, I have enough roasted veggies to see me through to next week.

Now, onto today’s food experiment, the arguta kiwis. I had about 5lbs that needed to be used ASAP. My friend made a gorgeous, yummy kiwi-ginger jam with her lot. Since the arguta kiwis are so naturally sweet, we only had to use 1/6th of the sugar called for in the recipe. We used No-sugar pectin. Since I had cased of jams and jellies already, I opted to pass on jamming them. Instead I went the yin-yang route and made a kiwi-lime sorbet and a kiwi hot sauce.

Since the arguta kiwis are non-fuzzy and only need their stems plucked off, they're easy to prep. Here are my Fast & Dirty kiwi recipes:

First the Yin of the Kiwi - Kiwi-Lime Sorbet

4 cups of kiwi puree

zest and juice of one lime or lemon (optional)

1/3 cup of simple syrup

Again, due to the sweetness of the fruit, I opted to play it conservative with the simple syrup which is nothing more than 1 part water with 1.5 parts sugar boiled together until clear.

Basically mix all the ingredients together, chill in the fridge for a couple and hours. Prepare in your ice-cream maker as directed. Or freeze in a baking pan, stirring every twenty minutes until it’s sorbet-like. Peggy at Kiwi Cove lodge also suggested freezing this in ice cube trays to be used for smoothies or daquiris.

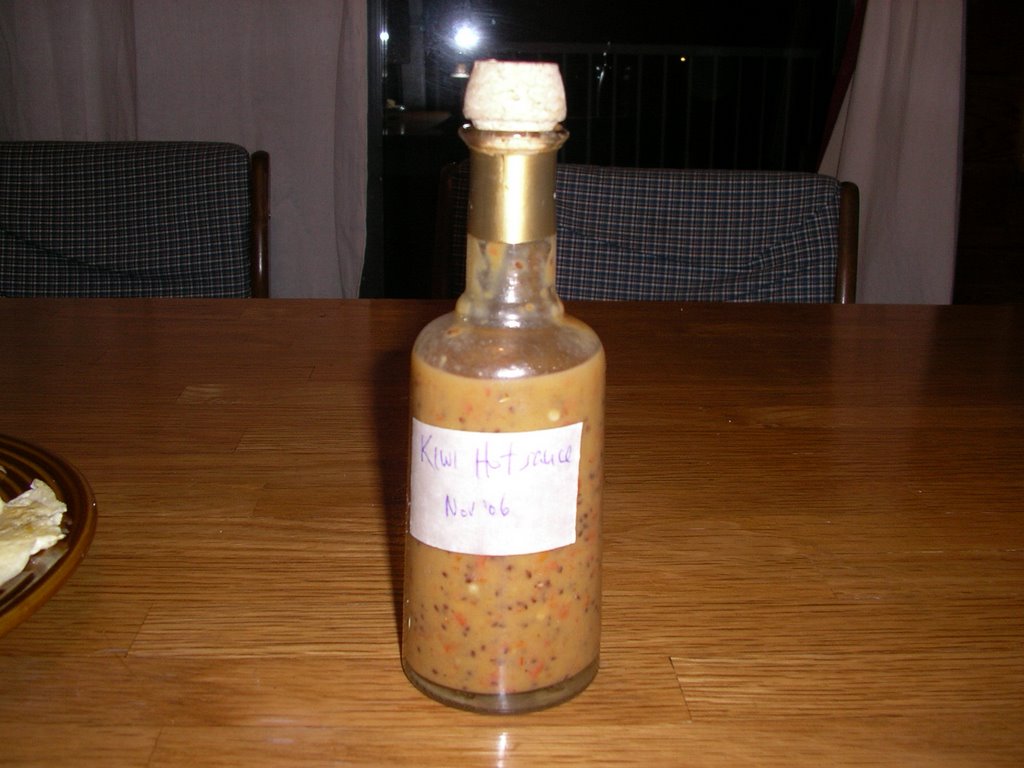
And now for the Yang of the Kiwi – Kiwi Hot Sauce

I made this largely because I was out of hot sauce. I actually was looking out for a good hot sauce these last few weeks and today realized, ‘Duh, I could just make some.’ I still had some lantern pepper from a Providence farms in the fridge and some local jalapenos in the freezer so I used those for my spice. Use what peppers you like. Jalapenos, scotch bonnets, little red thai, lanterns or habaneros. This recipe is for a medium spicy hot sauce. I prefer hot sauces that actually aren’t all heat and allow you to savor the flavour of the sauce and them have a delayed kick.

2 cups of kiwi puree

1/3 cup apple juice – I used unsweetened apple juice from Westwood Orchards

1/3 cup apple cider vinegar – I used one from Fruit First Farms in the Cowichan Valley

5 lantern peppers and 2 jalapenos – I use scissors to cut and dice the peppers right into the pot.

1 tablespoon honey (optional)– I used a local dark fir honey. It’s much more flavorful.

With a hand blender, I pureed it all in a pot and them simmered the sauce over medium heat for 10 mins. I poured it into a sterilized bottle. This will keep in the fridge for a couple of months if it doesn't get eaten up first.


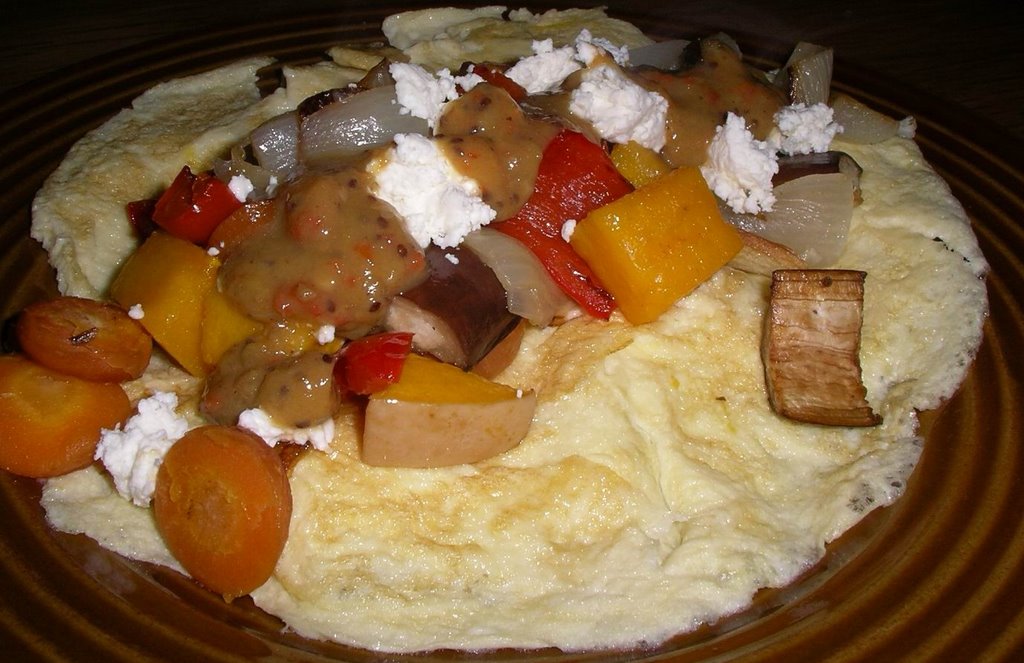
For dinner tonight I prepared a simple open omelet with roasted veggies, fromage frais from Little Qualicum cheeseworks and some of my kiwi hot sauce. The roasted veggies offered a nice bit of flavour and texture and the fromage frais helped richen it up. I really like the way my sauce brought a touch of sweetness with a slow mellow burn to the whole dish. Definitely a keeper.


And for dessert:

I love the popping of the kiwi seeds. I guess you could strain it through a fine sieve if you want a smoother, more refined sorbet. But, you know, rusty chainsaw, yadda yadda. It is the skin and bones that give most things their character.

Enjoy!

Jen

Tuesday, October 10, 2006

Thankful Tidbits

Thankful Tidibits

I hope everyone had a wonderful 100 Mile Thanksgiving. I have plenty to be thankful for. Let's start with the fact that I got to spend a wonderful evening with my DH and his family down in Victoria last night. DH was initially scheduled to work yesterday, but he got unceremoniously bumped off the schedule and so we packed ourselves into the car and headed down island and see his folks. What started as a spontaneous drive down island and to take his folks out for lunch, ended up with us joining his family for a delicious postponed Thanksgiving dinner with all the trimmings and even a wonderful pumpkin chiffon pie. Isn't it wonderful how things just kinda fall into place?

All along the way, we saw mountains of pumpkins at all the local farm stands. They were orange beacons of autumn lighting our way down the highway.


This Thanksgiving weekend started with a trip over to Gabriola Island for their 10th Annual Thanksgiving Studio & Gallery Tour. Of course, I stopped over by the farmers market beforehand to grab some veggies and pick up my studio tour buddies who had the inside scoop on who to see. Along our tour route, we also swung by the Good Earth farm to grab some good earth food ;)

I’m amazed by the talent and range of artwork on this tiny island. There was work in every medium imaginable from metalwork to intricate woodcarvings to photography to textiles. I enjoyed chatting with the artists as much as I enjoyed seeing their work. It’s a great way to meet with the creative energy behind the art and in the most gorgeous of settings.

I got a chance to meet Sheila Norgate, who is quickly becoming one of my favorite artists. Her installation, 'Dangerous Curves', showed in the Nanaimo Art Gallery earlier this year and was a poignant mixed-media critique of women’s bodies and etiquette. She had two series, a dog series and a bird series in acrylic showing in her studio this past weekend. Both had a clever, whimsical style to them and carried a wonderful sense of play. Another artist that stood out was Marcelle Glöck-Picot, a Mudge Island potter. Her pottery style embraces the art of wabi sabi with simple west coast touch. She even uses Mudge Island clay for some of her pieces. A 100 Mile potter!

I also managed to make my way to Indigo Moon Silks to revel in Trish Moon’s naturally hand-dyed ethically harvested raw silk and local wool yarns (I’ll write more about her in another entry soon). She is an amazing weaver and had some deliciously woven shawls and ponchos on sale. A whole day dedicated to local food and local art! I was one thankful kid!


DH and I had a mini-Thanksgiving dinner on Sunday evening. It was nice romantic dinner for two (awwwwwww…ain’t that sweet).

We had a lovely roasted free-ranged chicken from Piper's Meats. Piper’s sells local free-range, properly raised and fed critters of all sizes. A quick massage of olive oil and herbs and a generous seasoning of salt and pepper was all it needed. A properly raised chicken doesn’t need much more.

I threw it in the roasting pan with some baby potatoes, peppers, carrots and onions that I picked up at the Good Earth farm. We also had roasted garlic and pumpkin mash and, of course, gravy. For dessert we had a simple baked bosc pear crumble.

You don't need a fancy schmancy crepe pan for this. Any non-stick pan with do. I used a small non-stick saucepan and a non-stick wok. I don't use any fat in the pan. If your pan bottoms are truly non-stick you don't need any.

Heat up the pans over medium high heat. If they're cooking too fast for you to handle, then bring the heat down a notch. Once the pans are all heated up, bring over your batter, your crepe scoop ( I use a measuring scoop but a ladel or measuring cup will do), plastic turning over doohickey tool (aka spatula), and a plate with a cover to receive the cooked crepes.

I use about 1/3 cup of batter for each crepe. I hold the crepe pan slightly tilted with my left hand and with my right, ladle in the crepe batter into the pan. If you think of the handle as 6 o’clock, pour the batter onto the outer uphill edge of the pan at about 10 o’clock. The batter should start running down smoothly and as it does just slowly tilt the pan around so the batter moves to cover the largest area possible. It doesn't have to be round. Put it back onto the heat. Do not touch the crepe until it's ready to be turned!

So how do I know when it's ready?
You'll see the batter getting bubbling and cooking through and once the edges start getting the slightest bit of colour, lift up one corner of the crepe. The rest of the crepe should lift up easily with it. Flip the crepe and let the other side cook. It shouldn't take too long. If you can slide it back and forth by jiggling the pan it's pretty much ready.

The first crepe is the sacrifice crepe. Sacrifice crepes are a special crepe that is the martyr of the group and allows itself to be used to test the pan's temperature and the batter's consistency. Judging from the sacrifice crepe, adjust your heat and batter accordingly. The sacrifice crepe must be consumed by the cook while cooking the rest of the crepes. It's one of those esoteric French culinary laws. I suggest smearing some Little Qualicum's fromage frais and a drizzle of local dark fir honey onto the crepe then rolling it up for easy handling while you finish cooking up the rest. You wouldn't want to upset any of those French crepe gods, now would you?

Place the done crepes in the waiting plate and keep cover. Throw it into the oven just to keep warm and out of your way.

We had our crepes with fresh local fruits, water buffalo yoghurt from Fairburn farms and some cranberry/blueberry compote.

Crepes are one of those culinary chameleons. You can have them for every meal or as a snack. I tend to make a double or triple amount and freeze the extras. I simply stack them with parchment paper between them and toss them in the freezer. Whenever I want one, I just peel one off and toss it into the nukebox for 10-20 secs. There have been many a times I have been thankful I had a stack of crepes in my freezer.

For sweet crepes just add a spoonful of sweetener to the batter. I prefer honey but you can use sugar or maple syrup or flavoured simply syrup. You can add any ‘sweet’ spices like cinnamon, nutmeg or even a spoonful of cocoa powder for chocolate crepes. You can make them savoury by adding a few pinches of salt and some dried or fresh herbs or even curry powder. Or toss in a spoonful of tapenade or Thai green curry or pesto into the batter. Or leave them for plain-jane-easy-peasy-blank-slate-simply-deliciously naked crepes. For the flour, you can use pretty much any flour from kamut to spelt to buckwheat (which will give you a very French and wheat-free crepe).

The key is to add just a touch of seasoning to the crepe batter but to go full out for the crepe filling.

The filling possibilities are endless. Pretty much anything can be used from leftover curry to seafood salad to a simple smear of butter, sprinkle of brown sugar and squeeze of lemon. You can roll them up like burritos or stuff them to make pockets.

One of my favorite treats as a breakfast or dessert are baked fruit crepes pockets. It’s nothing harder than plopping a spoonful of leftover baked fruit into the centre of a crepe and folding the edges over to make a little fruit filled pouch. Place the pouches with the seam side down onto a baking dish and bake for 15 mins in a 325F. A sprinkle of powdered sugar is all you need to finish off this simple but elegant dish.

That's it for now. I’m hungry. Must eat.

Jen

Nanaimo's 100 Mile Diet Challenge